Gärtnerei-Simulator
Dev-Blog6 Min. Lesezeit

Husarenknöpfchen, mein liebster gelber Sommerflor

Eine meiner Lieblingspflanzen, ohne altes Modell und nur aus meinen Fotos gebaut. Wie das Husarenknöpfchen 'Aztekengold' ins Spiel kam.
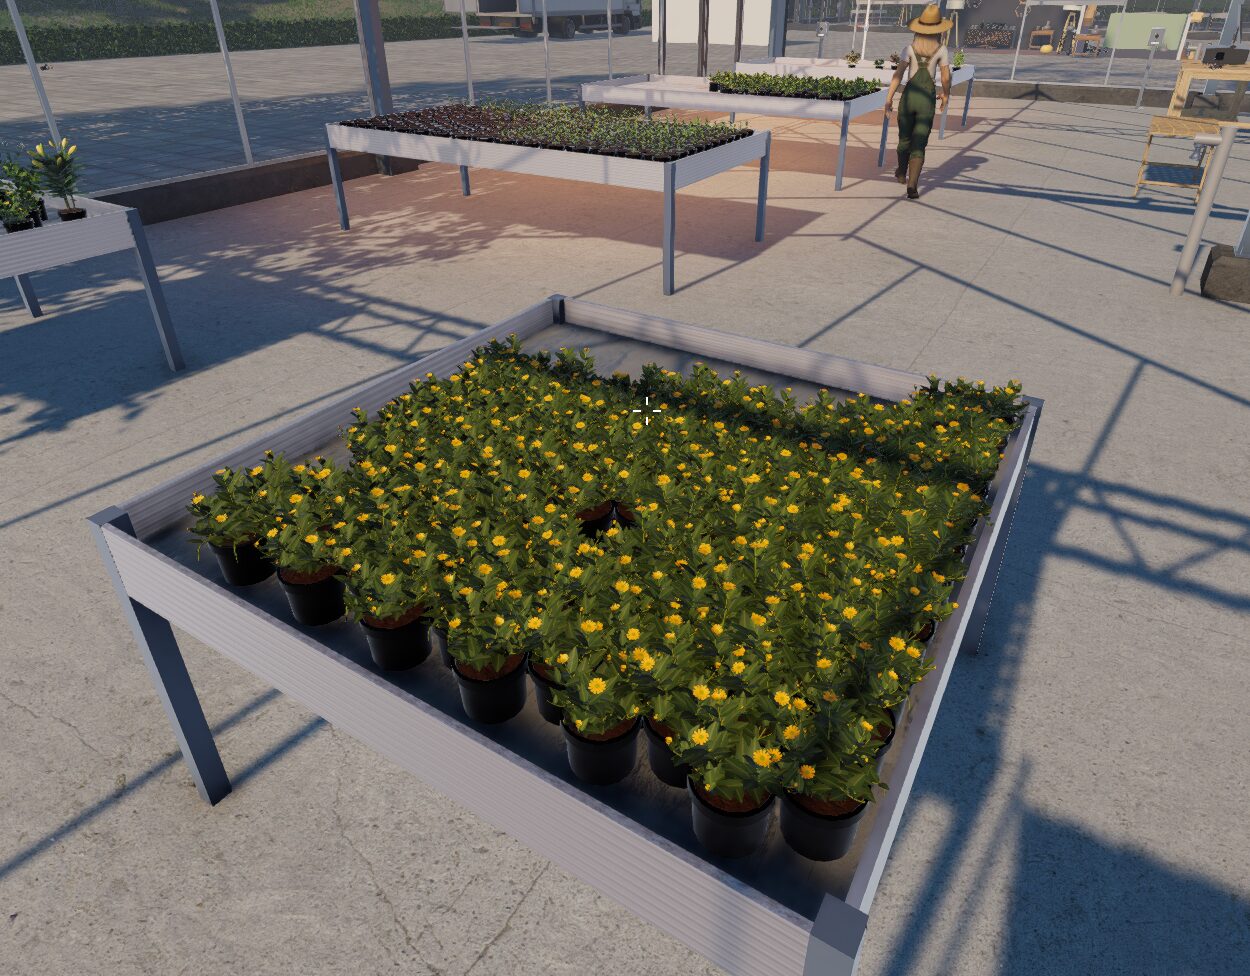
Pflanztisch im Gewächshaus des Spiels, dicht an dicht voller blühender Husarenknöpfchen mit kleinen gelben Blüten

Das Husarenknöpfchen gehört zu meinen Lieblingspflanzen. Es blüht den ganzen Sommer über, lange und mit unzähligen kleinen gelben Blüten. Es wächst etwas langsamer als andere Sommerblumen, ist aber eine tolle Pflanze für die volle Sonne und kommt auch im Halbschatten gut zurecht. Botanisch heißt es Sanvitalia procumbens, die Sorte im Spiel heißt 'Aztekengold'.

Zuerst habe ich versucht, das Husarenknöpfchen mit Gaussian Splatting ins Spiel zu bringen, also als 3D-Aufnahme aus vielen Einzelbildern. Das hat aber zu viel Leistung gekostet, und wachsen lassen konnte ich so eine Aufnahme nicht. Also habe ich die Pflanze neu gebaut, diesmal ganz ohne altes Modell, nur nach meinen Fotos.

Die Vorlage

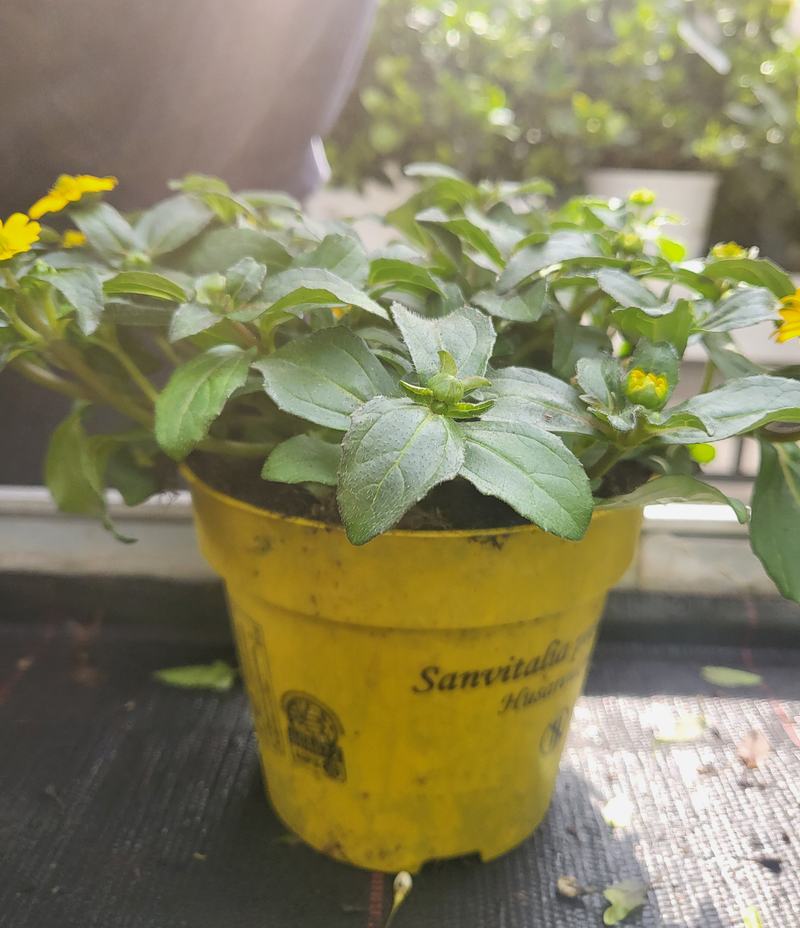
Als Vorlage dienten mir Husarenknöpfchen aus der Gärtnerei. Ich habe sie gekauft, fotografiert und dann nachmodelliert.
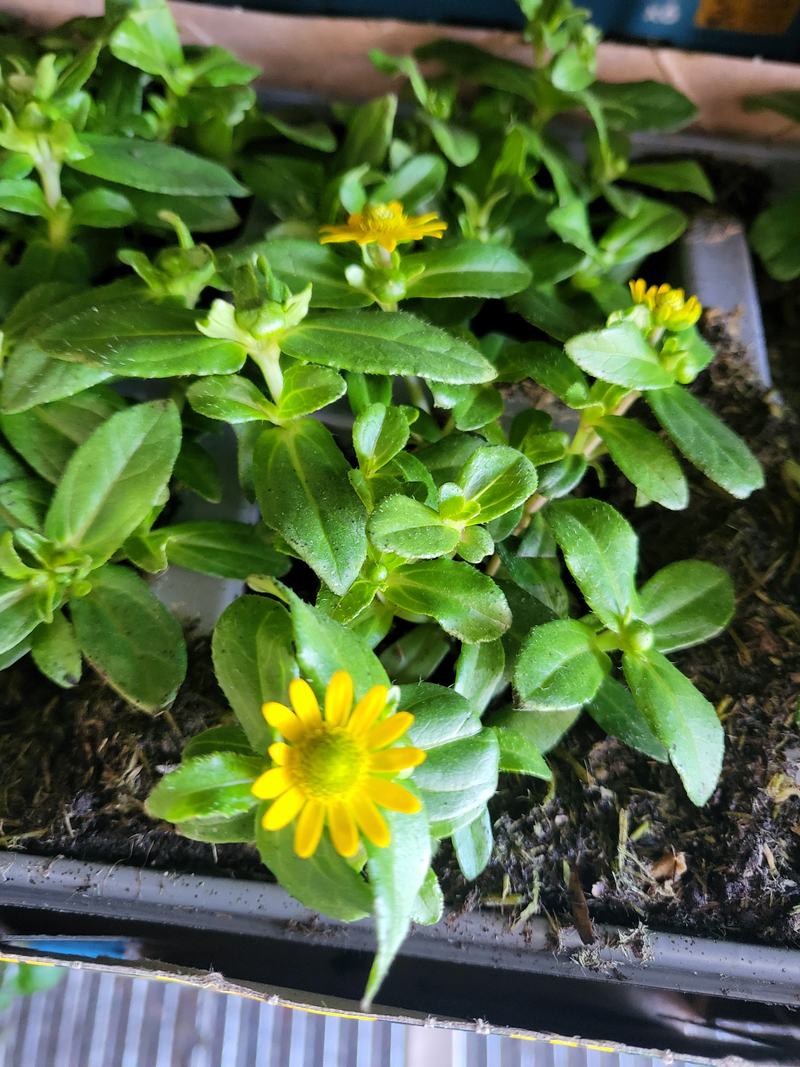
Junges Husarenknöpfchen in einer Anzuchtschale mit der ersten gelben Blüte
Husarenknöpfchen im gelben Topf auf einem Gärtnereitisch
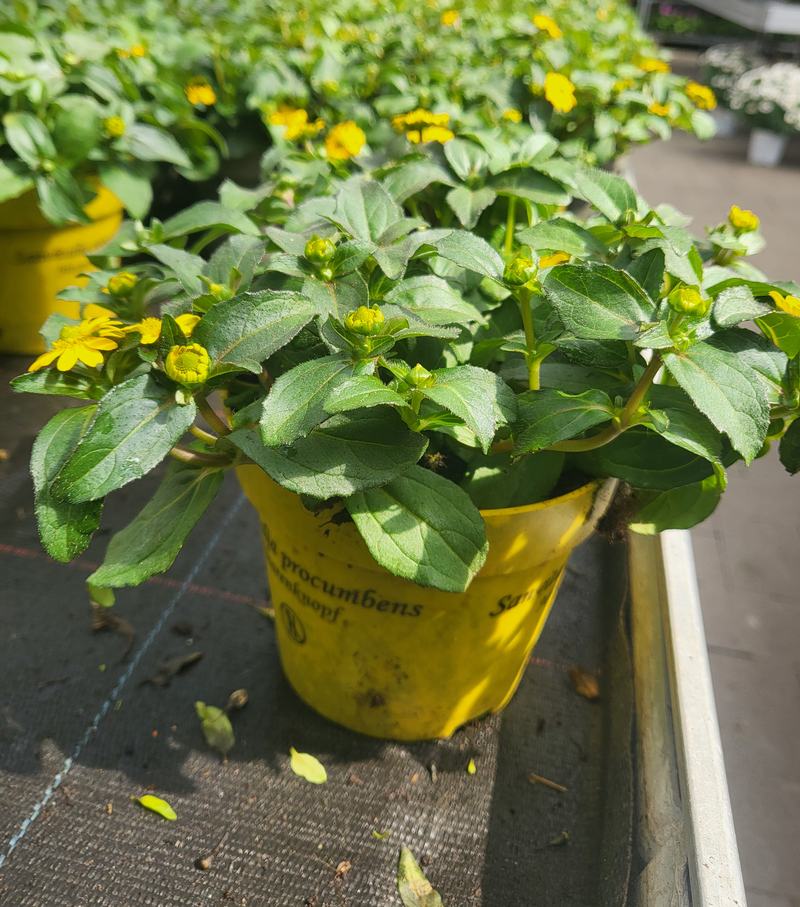
Husarenknöpfchen im gelben Topf von der Seite, dahinter weitere Töpfe
Eine Jungpflanze und zwei ausgewachsene Husarenknöpfchen aus der Gärtnerei.

Ein Foto hat keinen Maßstab, ein Topf schon. Am Topfrand mit gut zwölf Zentimetern Durchmesser habe ich alles andere abgemessen: Höhe, Breite und die Größe der Blätter und Blüten. Die fertige Pflanze hat wie die aus der Gärtnerei rund 20 offene Blüten.
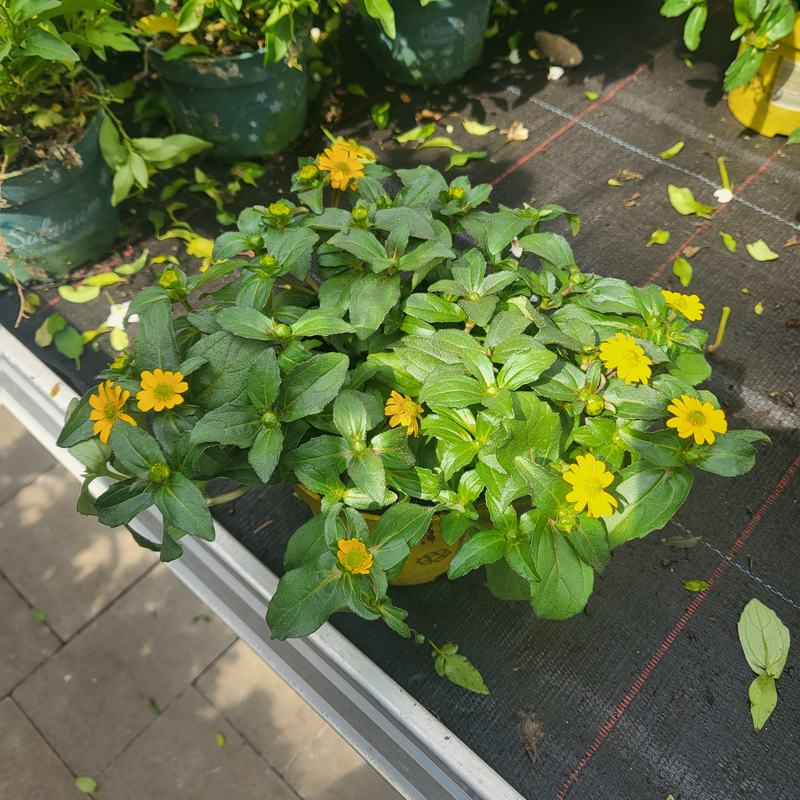
Husarenknöpfchen von oben auf einem Gärtnereitisch, ein dichtes Polster mit vielen gelben Blüten
Von oben sieht man gut, wie dicht das Polster ist und wie die Blüten darin verteilt sind.

Die Blüte

Jede Blüte des Husarenknöpfchens hat in der Mitte eine grüngelbe Scheibe und darum einen Kranz aus ungefähr dreizehn gelben Blütenblättern. Das klingt einfach. Bis die Blüte so aussah wie auf meinen Fotos, hat es aber mehrere Etappen gebraucht.

Am Anfang ging es nur darum, wie die Blütenblätter an der Scheibe sitzen. Beim ersten Versuch liefen sie als schmale Streifen zur Mitte zusammen, und dazwischen klafften keilförmige Lücken bis an die Scheibe. Im zweiten waren sie zu weit nach außen miteinander verbunden und sahen aus wie ein starrer Kranz. Erst im dritten saßen sie nur unten aneinander und standen nach außen frei.
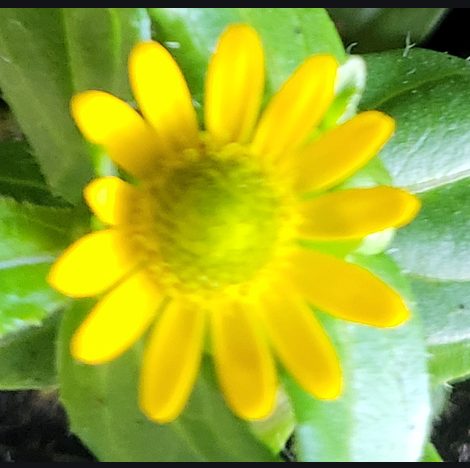

Foto einer echten Husarenknöpfchen-Blüte von oben
Frühe Fassung der Blüte von oben, ein gleichmäßiger Kranz aus gelben Blütenblättern
Links eine echte Blüte, rechts meine Blüte nach den ersten Versuchen.

Die Form stimmte jetzt, aber alle Blütenblätter waren gleich lang, gleich breit und lagen schön ordentlich in einer Ebene. So sieht keine echte Blüte aus. In der nächsten Etappe habe ich die Blütenblätter deshalb in ihrer Ausrichtung versetzt. Jedes ist ein wenig länger oder kürzer, breiter oder schmaler, seitlich verschoben, leicht verdreht und schräg abgeschnitten. Dazu ist jedes etwas angehoben oder abgesenkt, und dadurch hat die Blüte Tiefe bekommen. Jede Blüte im Spiel hat ihre eigene Mischung davon, keine gleicht der anderen.
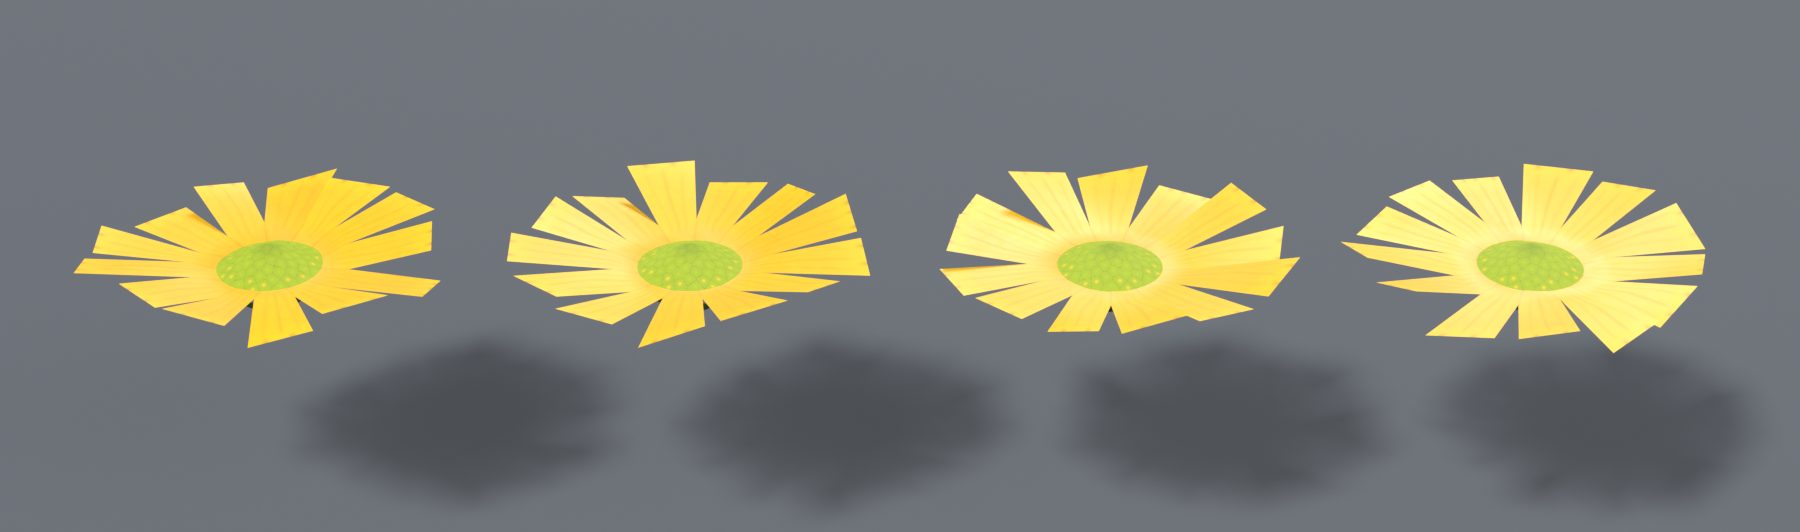
Vier offene gelbe Blüten, deren Blütenblätter unterschiedlich lang, versetzt und schräg gestellt sind, mit spitzen Enden
Die Blütenblätter in ihrer Ausrichtung versetzt und mit Tiefe, noch mit spitzen Enden.

Jetzt waren mir die Enden zu eckig. Jedes Blütenblatt endete mit zwei Ecken, wie mit der Schere abgeschnitten. Ich habe ihm am Ende einen dritten Punkt gegeben und die Ecken etwas nach hinten und zur Mitte gesetzt. Beim ersten Versuch war das zu wenig und sah aus wie ein flaches Dach, beim zweiten lief das Blatt rund aus.

Zwei Blüten von oben, links mit eckigen, rechts mit runden Enden der Blütenblätter
Links die eckigen Enden, rechts die runden.

So sieht die fertige Blüte aus, versetzt, mit Tiefe und runden Enden.
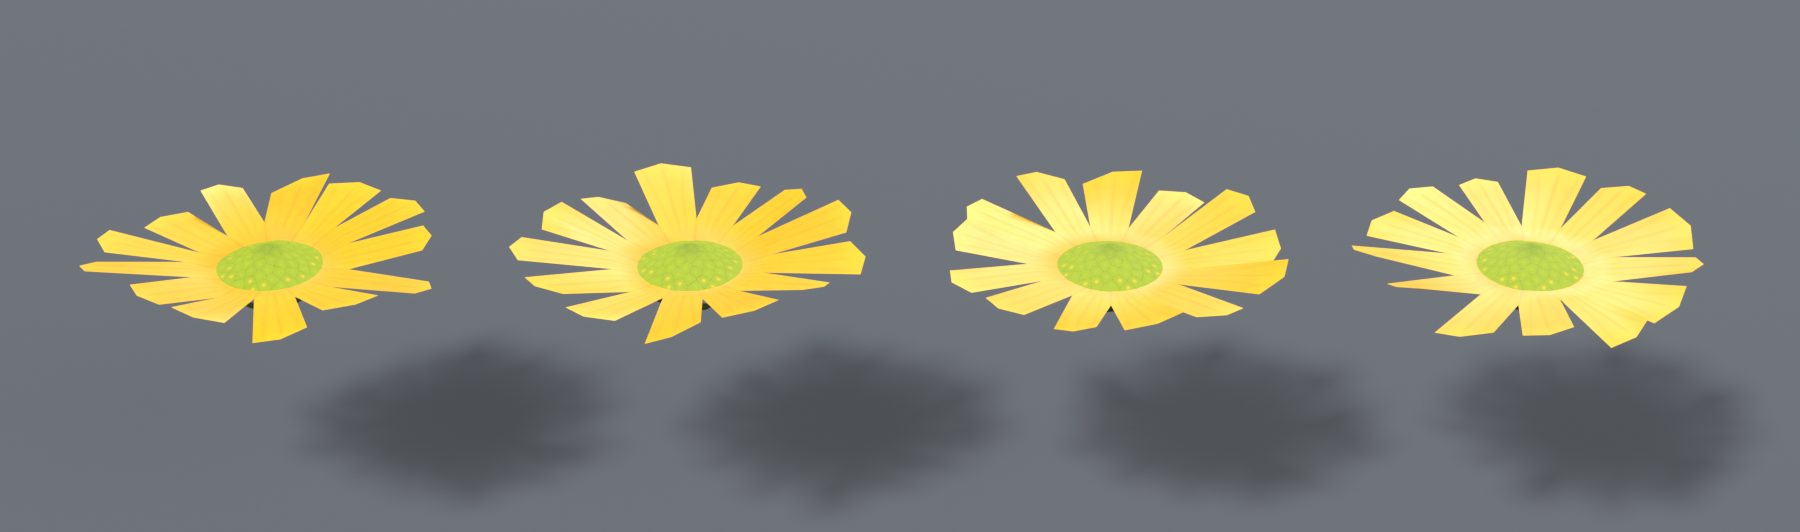
Vier offene gelbe Blüten mit runden Enden, jede mit etwas anders gestellten Blütenblättern
Die fertigen Blüten, jede mit ihrer eigenen Form.

Wie bei der Geranie ist das Aufblühen nur eine Verformung derselben Blüte. Am Anfang ist sie eine kleine grüne Knospe mit gelber Spitze, dann öffnet sie sich zu einem gelben Becher und wird zuletzt fast flach.
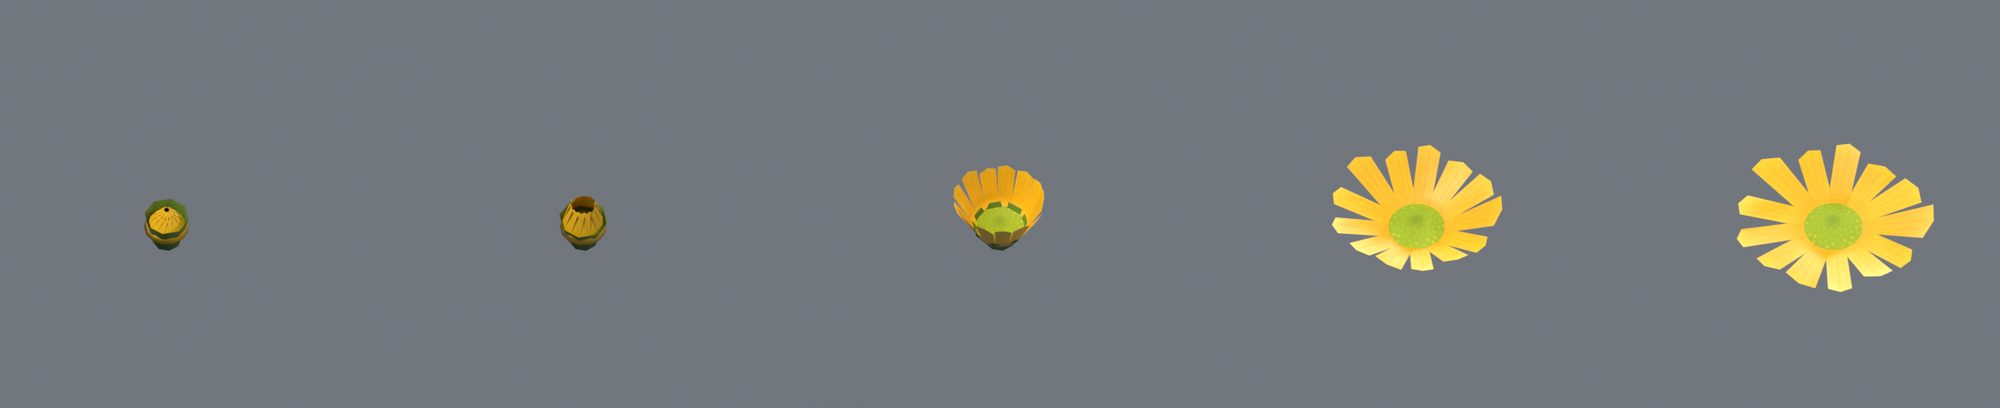
Eine Blüte in fünf Stufen, von der kleinen grünen Knospe bis zur offenen gelben Blüte
Eine Blüte geht auf.

Die Form der Pflanze

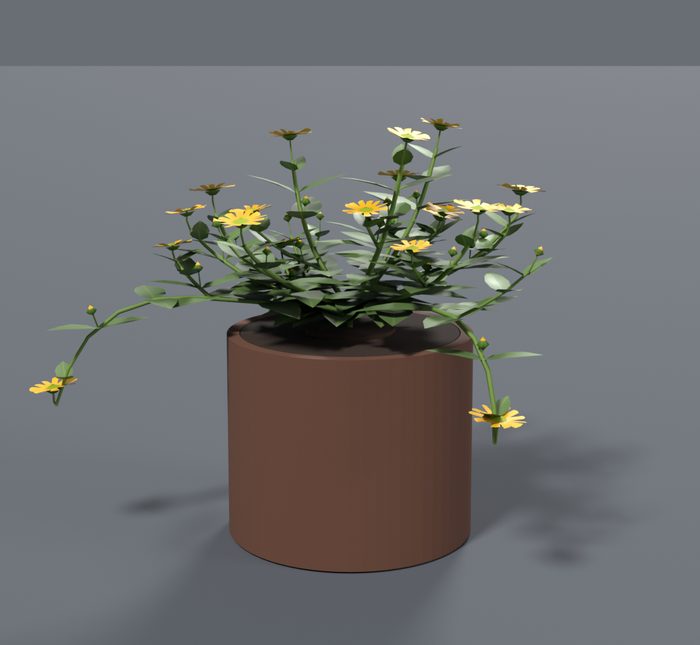
Meine erste ganze Pflanze war viel zu licht. Die Blüten saßen auf langen Stielen über einem dünnen Blätterkleid, und von oben sah das Ganze aus wie ein Stern. Danach habe ich sie Schritt für Schritt dichter gemacht, bis sie so buschig war wie auf den Fotos.
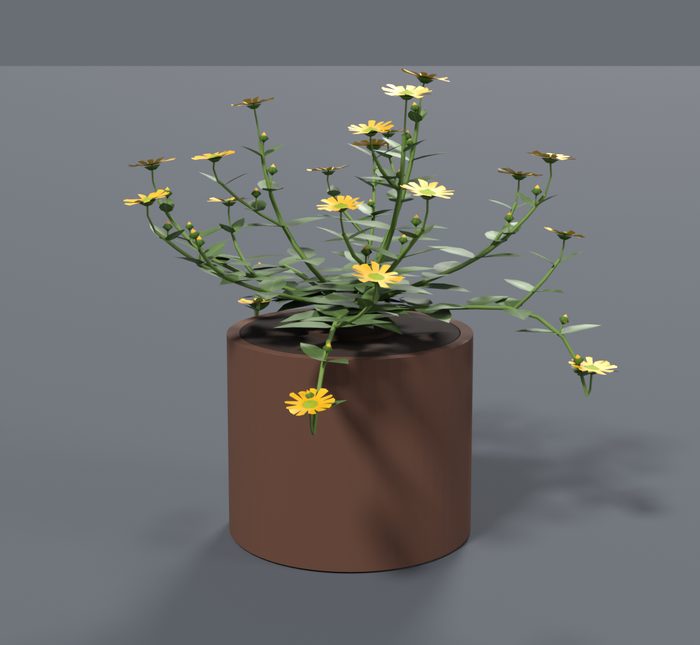
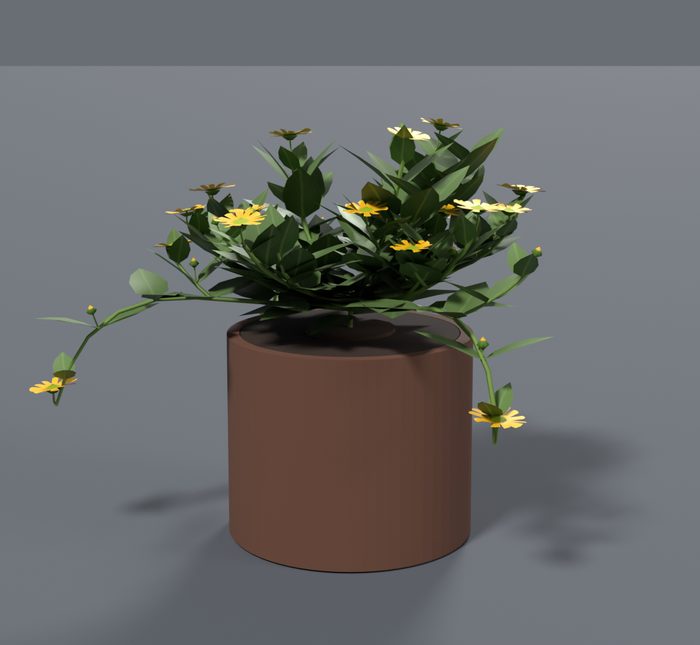
Erste Fassung der Pflanze im Topf, locker und staksig mit Blüten auf langen Stielen
Vierte Fassung, schon dichter, aber noch mit sichtbaren Lücken
Siebte Fassung mit dichtem Laub und Blüten im Laub
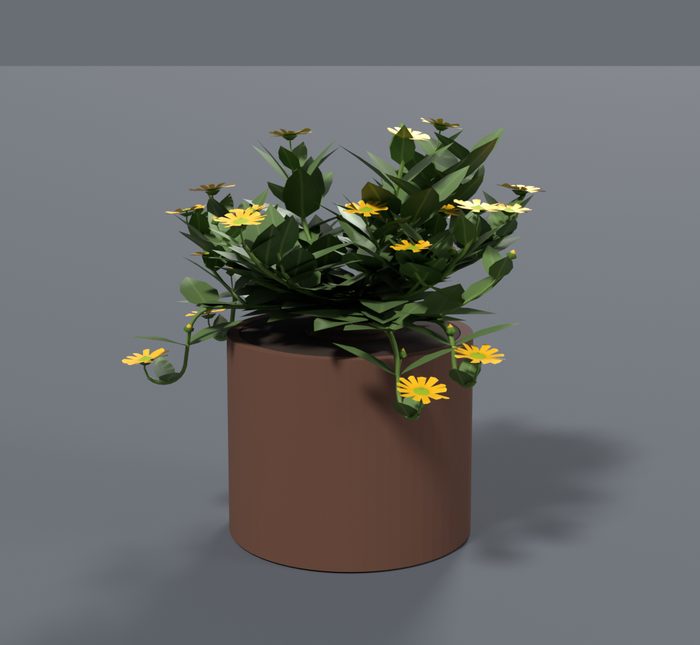
Neunte und letzte Fassung mit dichtem Polster und kurzen hängenden Trieben
Die erste, vierte, siebte und neunte Fassung.

Die meiste Arbeit haben am Ende die hängenden Triebe gemacht. Erst hing die Blüte an ihrer Spitze nach unten, als wäre der Trieb abgeknickt. Echte Husarenknöpfchen richten ihre Spitze aber wieder auf. Danach zeigte die Blüte zwar nach oben, aber die Triebe waren viel zu lang und ragten weit über den Topf hinaus. In der neunten Fassung legen sie sich knapp hinter dem Rand über die Kante, hängen ein kleines Stück herunter und heben dann die Spitze mit der Blüte, so wie auf den Fotos.

Und weil echte Pflanzen sich nicht gleichen, hat im Spiel jede Pflanze ihre eigene Zahl an hängenden Trieben, zwischen keinem und fünf.
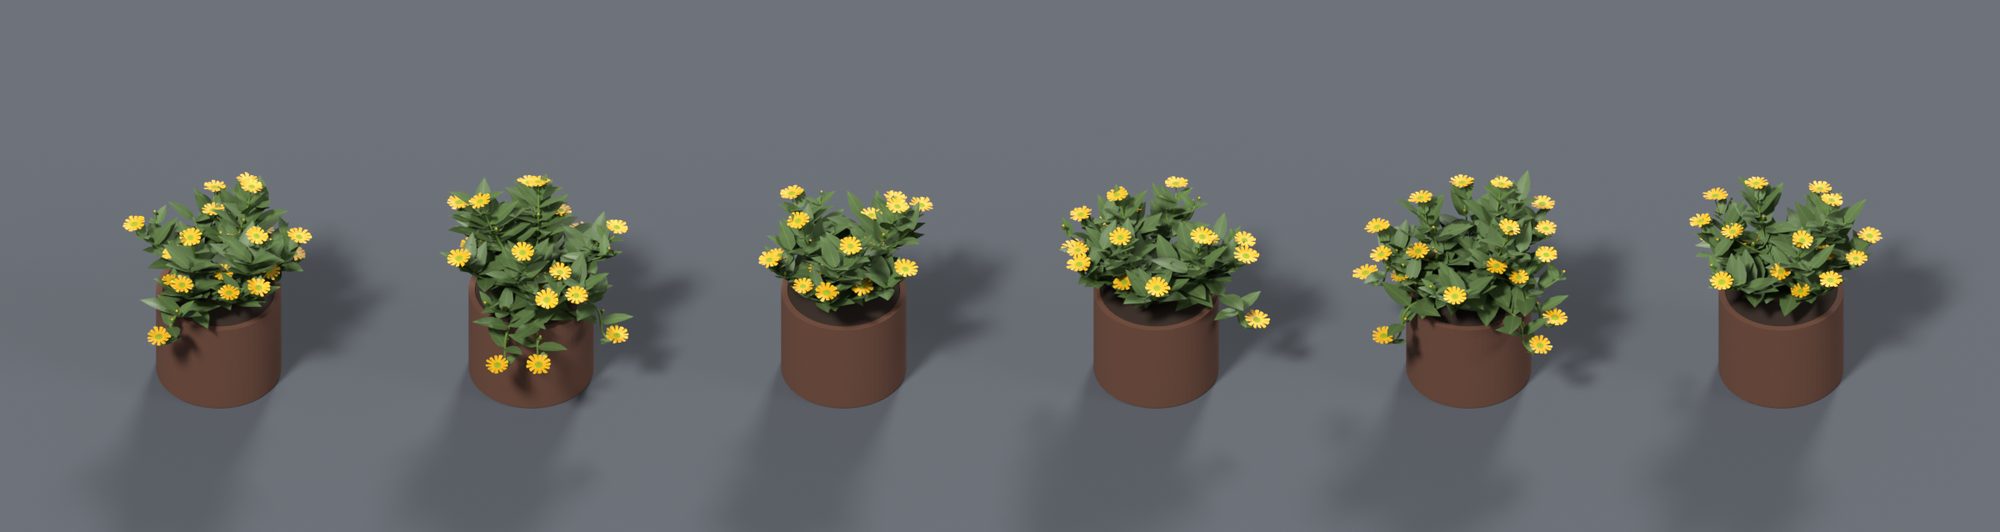
Sechs Husarenknöpfchen nebeneinander mit unterschiedlich vielen hängenden Trieben
Mal fünf hängende Triebe, mal einer, mal keiner.

Die fertige Pflanze hat 22 Blüten, 27 Knospen und 278 Blätter. Mit 6.740 Vertices ist sie etwas größer als die Geranie, kostet im Testaufbau aber nicht messbar mehr Rechenzeit.

Wachsen

Gewachsen wird nach derselben Regel wie bei der Geranie. Gebaut ist nur die fertige Pflanze, und alles davor entsteht, indem sie kleiner wird und sich zusammenfaltet. Das Husarenknöpfchen beginnt dabei wirklich klein, mit knapp drei Zentimetern und ein paar jungen Blattpaaren. Das passt, denn in der Anzuchtschale sind die Pflänzchen am Anfang winzig.
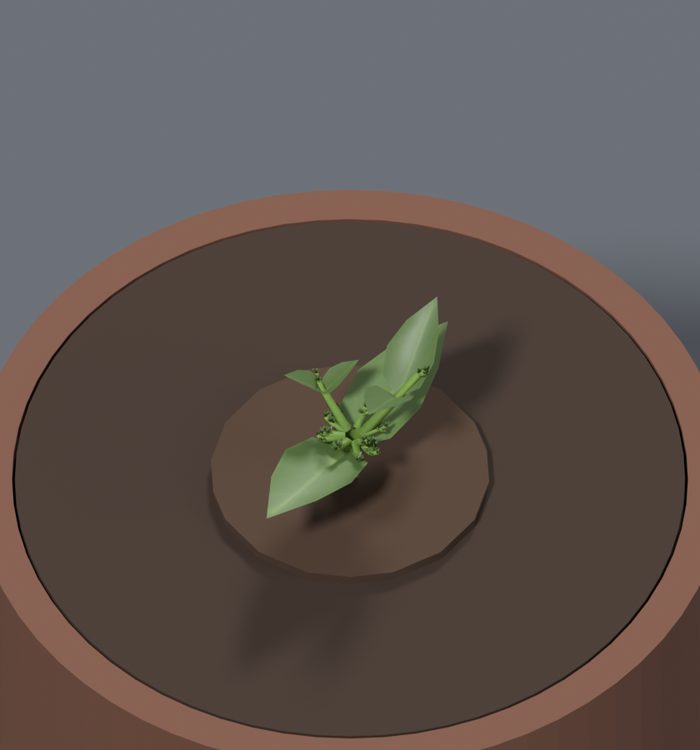
Winzige Jungpflanze mit wenigen Blättern in der Mitte eines großen Topfes
Am Anfang ist vom Husarenknöpfchen kaum etwas zu sehen.

Danach treiben die Triebe aus, die Blattpaare entfalten sich, und noch vor der Hälfte des Wachstums gehen die ersten Blüten auf. Zuletzt legen sich die hängenden Triebe über den Rand.

Das Husarenknöpfchen von der Jungpflanze bis zur Blüte.

Im Spiel

Seit dem 1. Oktober steht das Husarenknöpfchen im Spiel. Ihr kauft es als Jungpflanzen in der Anzuchtplatte und setzt sie auf dem Pflanztisch in Töpfe.
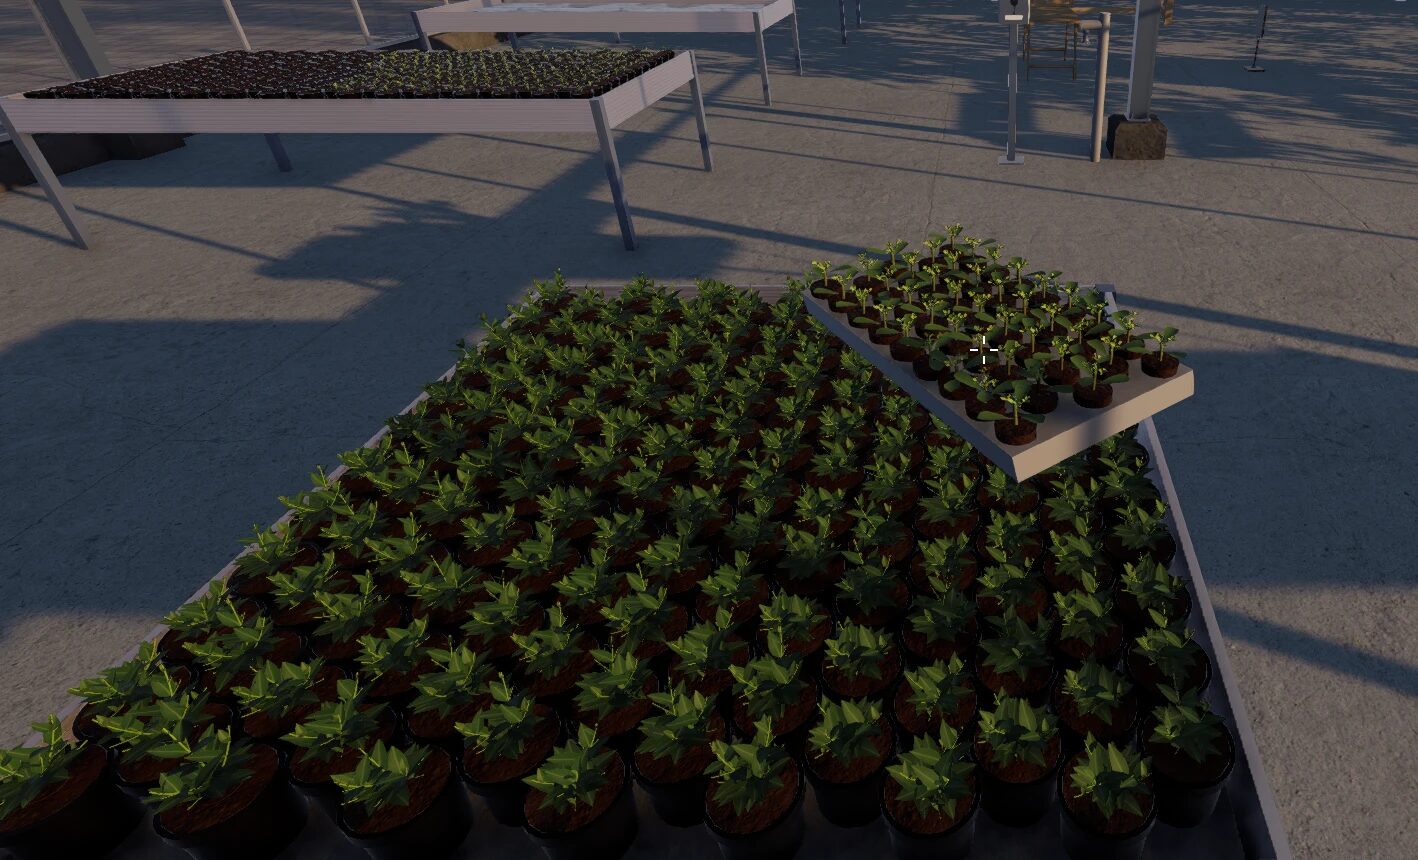
Pflanztisch im Spiel mit vielen jungen Husarenknöpfchen in Töpfen, darüber eine Anzuchtplatte mit Jungpflanzen
Jungpflanzen aus der Anzuchtplatte kommen in die Töpfe.

Es zählt zu den hängenden Pflanzen und braucht nur wenig Wasser. Zu viel Wasser mag es nicht, das zeigt euch auch die Pflanzenanzeige.
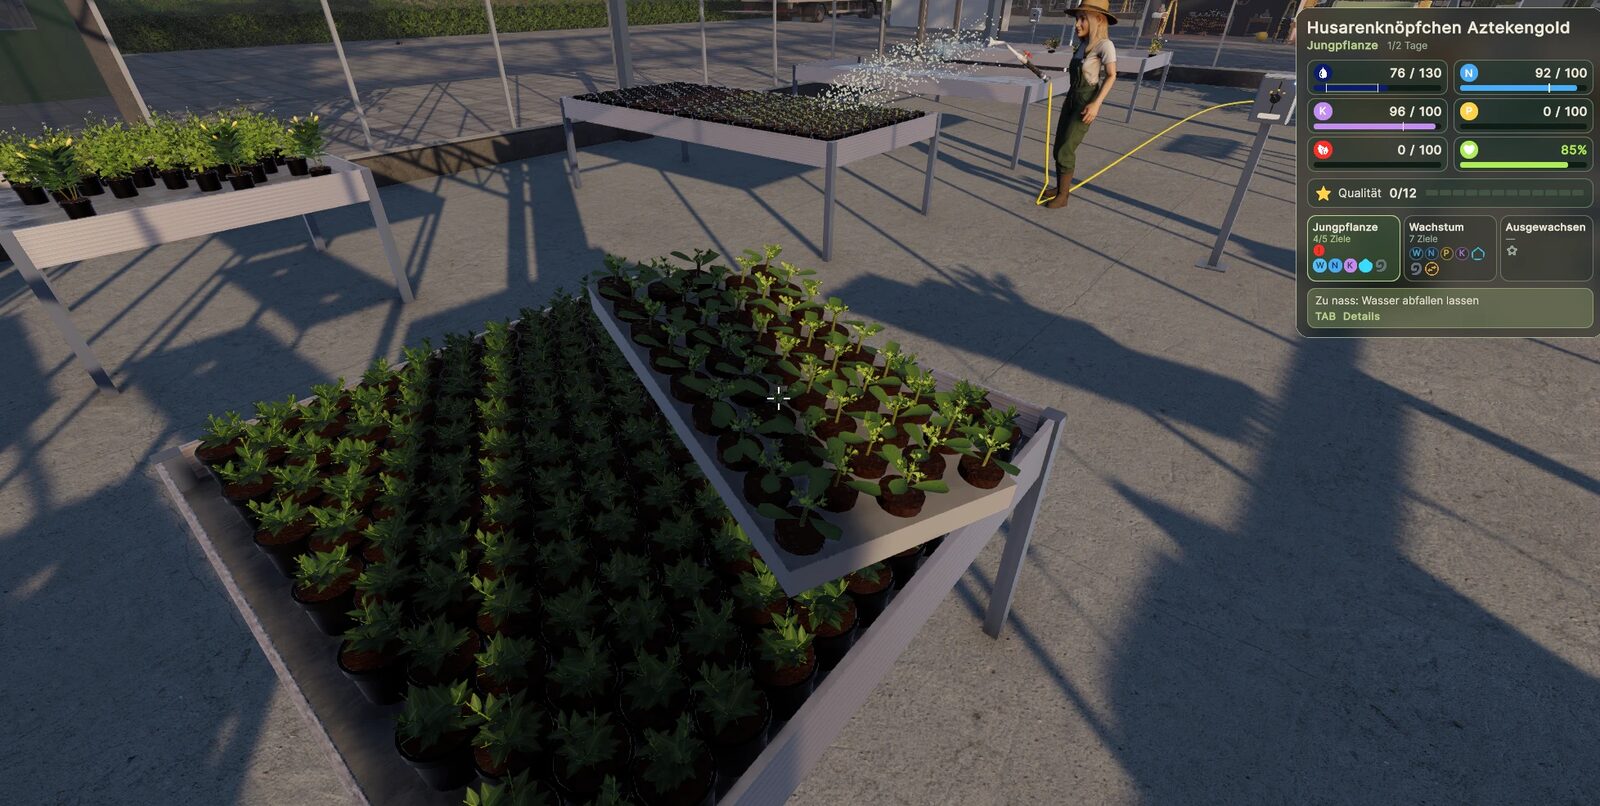
Pflanztisch mit jungen Husarenknöpfchen, rechts die Pflanzenanzeige mit Wasser und Nährstoffen, im Hintergrund gießt eine Mitarbeiterin
Rechts die Werte der Pflanze, hinten gießt eine Mitarbeiterin den nächsten Tisch.

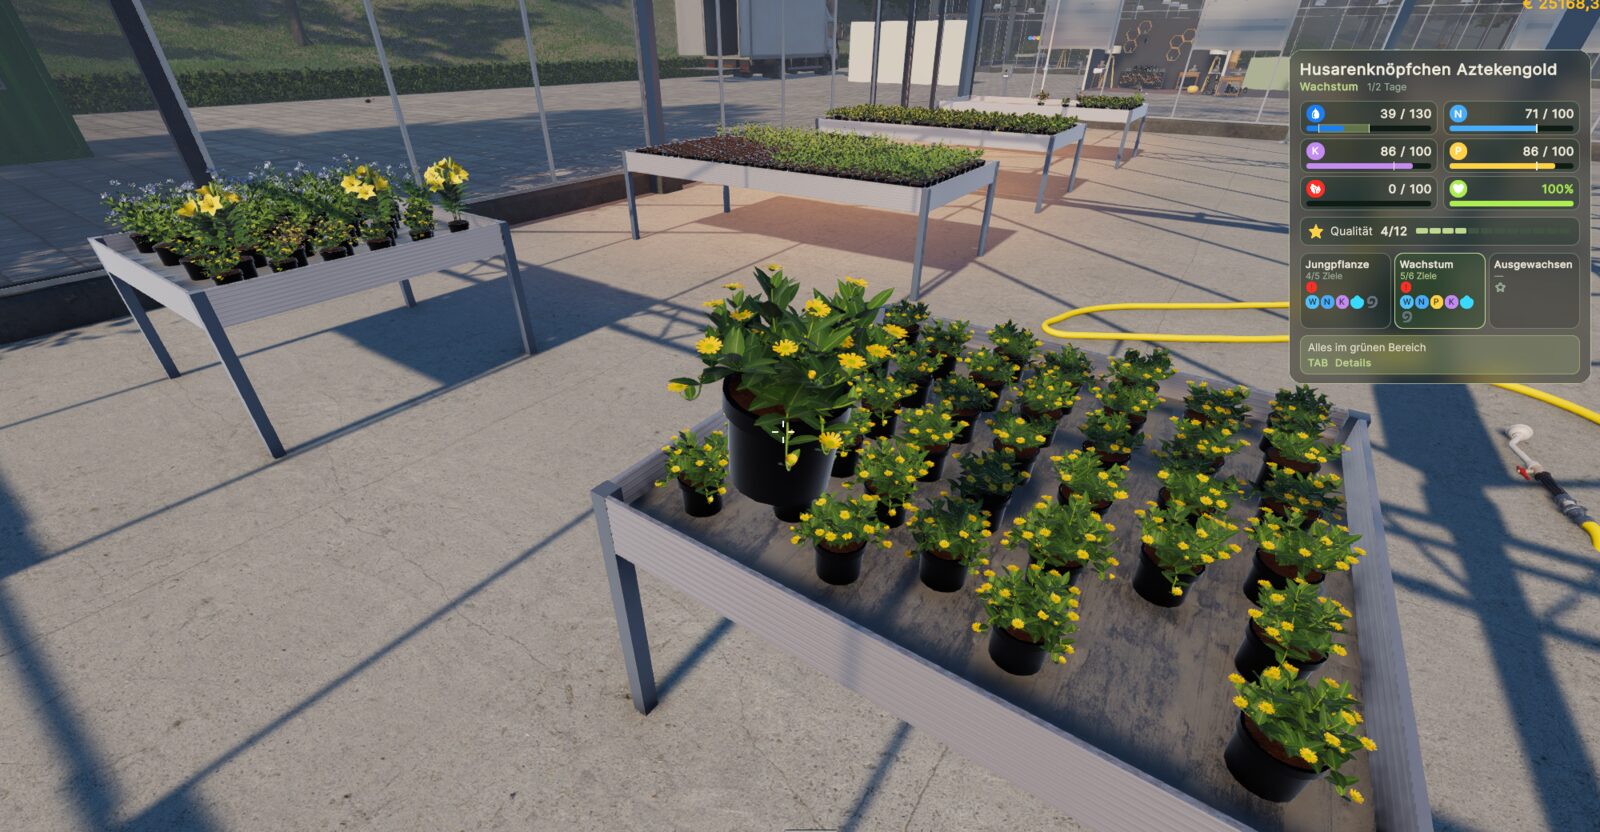
Nach ein paar Tagen ist aus den Jungpflanzen ein Tisch voller gelber Blüten geworden.
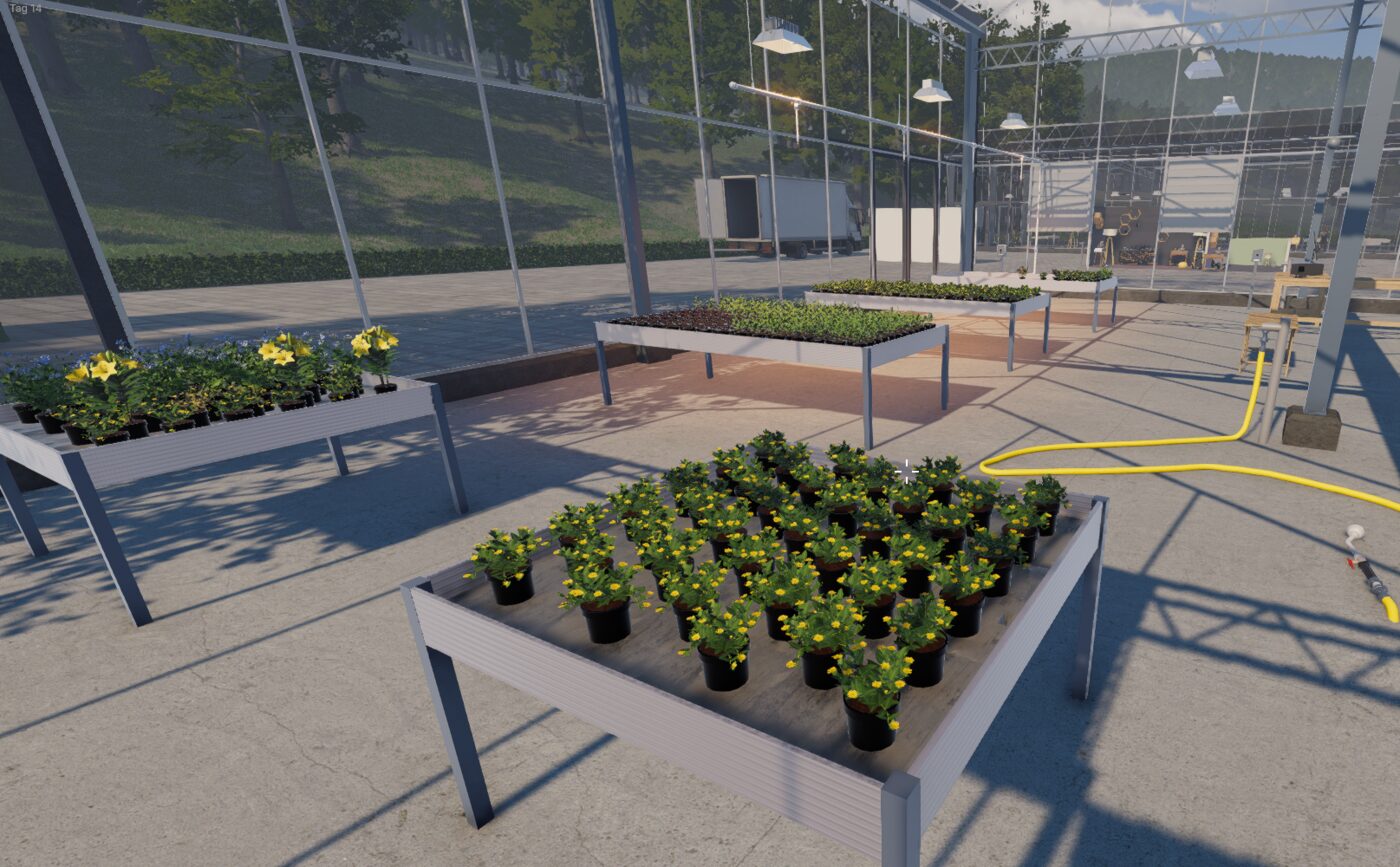
Pflanztisch im Gewächshaus mit blühenden Husarenknöpfchen in schwarzen Töpfen
Eine blühende Pflanze wird vom Tisch gehoben, rechts ihre Werte mit Qualität und Wachstumsstufe
Ausgewachsen und bereit für den Verkauf. Rechts die Werte der Pflanze in der Hand.

Wie es weitergeht

Das Husarenknöpfchen war nach der Verbene die zweite Pflanze, für die es gar kein altes Modell gab. Seitdem baue ich neue Pflanzen fast nur noch so, aus Fotos und manchmal auch aus Videos von echten Pflanzen. Als Nächstes erzähle ich von der Bleiwurz. Wenn es um Blau geht, ist sie mein absoluter Liebling, ich kenne kein schöneres Blau. Sie ist die erste Pflanze im Spiel mit blauen Blüten und gehört zu den ersten, die es auch am Spalier gibt.
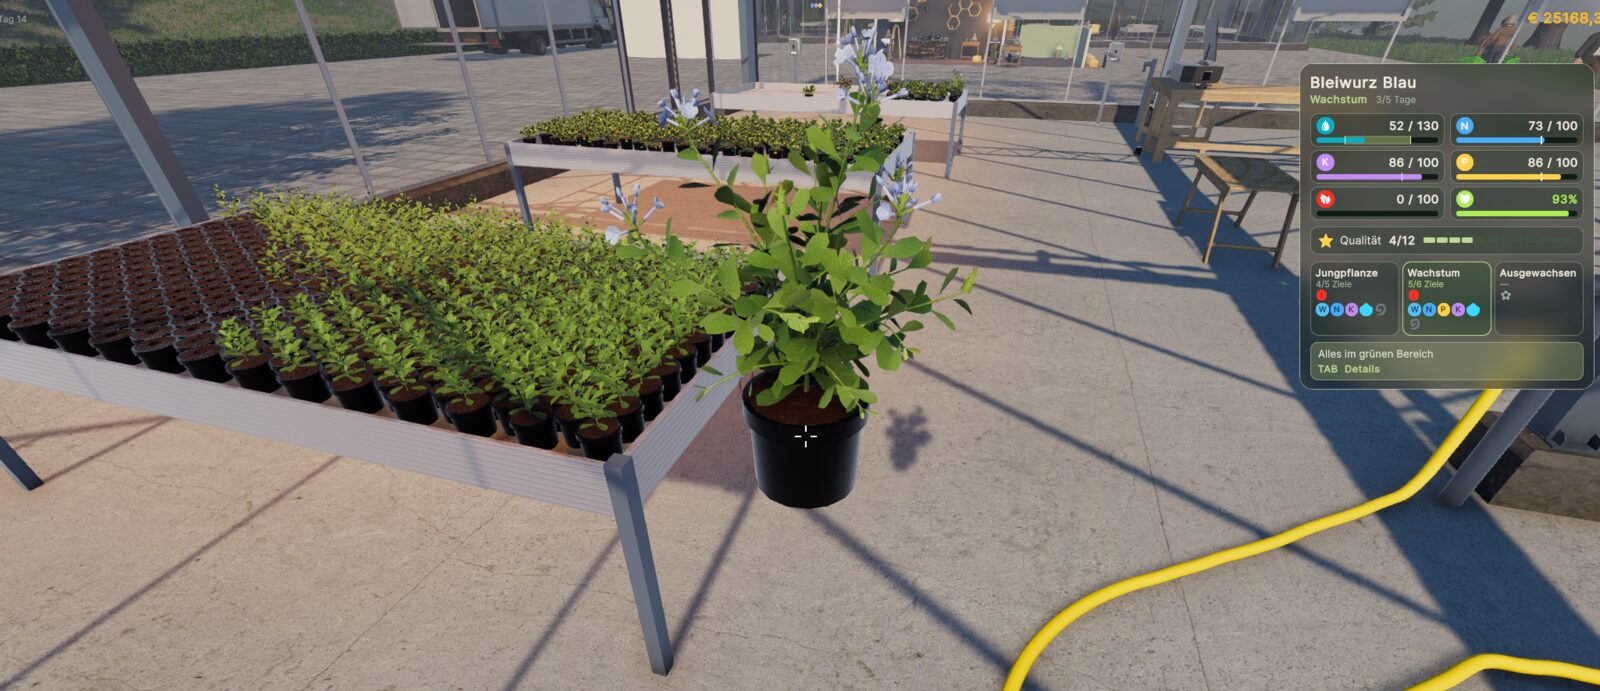
Pflanztisch mit jungen Bleiwurz-Pflanzen, vorne eine größere Bleiwurz mit hellblauen Blüten in der Hand, rechts ihre Werte
Ein kleiner Vorgeschmack auf den nächsten Beitrag: die Bleiwurz.

Fragen oder Anmerkungen? Schreibt mir gern an info@gaertnerei-simulator.de.
Dev blog6 min read

Creeping zinnia, my favorite yellow summer bloomer

One of my favorite plants, built without an old model, just from my own photos. How the creeping zinnia 'Aztekengold' made it into the game.

Planting table in the game's greenhouse, packed with flowering creeping zinnias covered in small yellow flowers

The creeping zinnia is one of my favorite plants. It flowers all summer long, for months and with countless small yellow flowers. It grows a little slower than other summer flowers, but it's a great plant for full sun and does well in partial shade too. Its botanical name is Sanvitalia procumbens, and the variety in the game is called 'Aztekengold'.

My first attempt was to bring the creeping zinnia into the game with Gaussian splatting, a 3D capture made from lots of individual images. But that cost too much performance, and there was no way to make a capture like that grow. So I built the plant from scratch instead, this time without any old model, just from my photos.

The real plants

My reference was creeping zinnias from a nursery. I bought them, photographed them and then rebuilt them in 3D.

Young creeping zinnia in a seed tray with its first yellow flower
Creeping zinnia in a yellow pot on a nursery bench
Creeping zinnia in a yellow pot from the side, more pots behind it
A young plant and two fully grown creeping zinnias from the nursery.

A photo has no scale, but a pot does. I measured everything against the pot rim, a good twelve centimeters across: height, width and the size of the leaves and flowers. Like the plants from the nursery, the finished plant has around 20 open flowers.

Creeping zinnias from above on a nursery bench, a dense cushion with many yellow flowers
From above you can see how dense the cushion is and how the flowers are spread across it.

The flower

Each creeping zinnia flower has a greenish-yellow disc in the middle with a ring of about thirteen yellow petals around it. Sounds simple. But it took several stages before the flower looked like the ones in my photos.

At first it was all about how the petals sit on the disc. In the first attempt they ran into the centre as narrow strips, with wedge-shaped gaps between them all the way down to the disc. In the second they were joined too far out and looked like a stiff wreath. Only in the third were they joined just at the base and free towards the tips.

Photo of a real creeping zinnia flower from above
Early version of the flower from above, an even wreath of yellow petals
On the left a real flower, on the right my flower after the first attempts.

Now the shape was right, but every petal was the same length, the same width, and lay neatly in one plane. No real flower looks like that. So in the next stage I offset the petals in their orientation. Each one is a little longer or shorter, wider or narrower, shifted to the side, slightly twisted and cut at an angle. On top of that each one is raised or lowered a little, which gave the flower depth. Every flower in the game has its own mix of this, so no two look the same.

Four open yellow flowers whose petals differ in length, are offset and tilted, still with pointed tips
The petals offset in their orientation and with depth, still with pointed tips.

Then I found the tips too angular. Each petal ended in two corners, as if cut off with scissors. I gave it a third point at the tip and moved the corners back a little and towards the middle. The first try wasn't enough and looked like a flat roof, the second one rounded the petal off nicely.

Two flowers from above, on the left with angular, on the right with rounded petal tips
Angular tips on the left, rounded ones on the right.

This is the finished flower, offset, with depth and rounded tips.

Four open yellow flowers with rounded tips, each with slightly different petals
The finished flowers, each with its own shape.

Just like with the geranium, opening up is only a deformation of the same flower. It starts as a small green bud with a yellow tip, then opens into a yellow cup and finally becomes almost flat.

A flower in five stages, from a small green bud to an open yellow flower
A flower opening up.

The shape of the plant

My first complete plant was far too sparse. The flowers sat on long stalks above a thin layer of leaves, and from above the whole thing looked like a star. After that I made it denser step by step until it was as bushy as in the photos.

First version of the plant in its pot, loose and spindly with flowers on long stalks
Fourth version, denser already but still with visible gaps
Seventh version with dense foliage and flowers among the leaves
Ninth and final version with a dense cushion and short trailing shoots
The first, fourth, seventh and ninth version.

In the end, the trailing shoots took the most work. At first the flower at the tip hung downwards, as if the shoot had snapped. Real creeping zinnias turn their tips back up, though. After that the flower pointed upwards, but the shoots were far too long and stuck out way past the pot. In the ninth version they drape over the edge just behind the rim, hang down a short way and then lift the tip with the flower, just like in the photos.

And because real plants are never identical, every plant in the game has its own number of trailing shoots, anywhere from none to five.

Six creeping zinnias side by side with different numbers of trailing shoots
Sometimes five trailing shoots, sometimes one, sometimes none.

The finished plant has 22 flowers, 27 buds and 278 leaves. At 6,740 vertices it's a little bigger than the geranium, but in my test setup it doesn't cost any measurable extra rendering time.

Growing

Growth follows the same rule as with the geranium. Only the finished plant is built, and everything before it is created by making it smaller and folding it up. The creeping zinnia starts out really small, at just under three centimeters with a few young pairs of leaves. That fits, because in the seed tray the little plants are tiny at first.

Tiny young plant with a few leaves in the middle of a large pot
At the start there's hardly anything to see.

Then the shoots grow out, the pairs of leaves unfold, and before the halfway point of growth the first flowers open. Finally the trailing shoots drape over the rim.

The creeping zinnia from young plant to bloom.

In the game

The creeping zinnia has been in the game since October 1. You buy it as young plants in a seed tray and pot them up on the planting table.

Planting table in the game with many young creeping zinnias in pots, a seed tray with young plants above them
Young plants from the seed tray go into the pots.

It counts as a trailing plant and needs only a little water. It doesn't like too much water, and the plant panel tells you so.

Planting table with young creeping zinnias, on the right the plant panel with water and nutrients, in the background an employee is watering
On the right the plant's values, in the back an employee waters the next table.

A few days later the young plants have turned into a table full of yellow flowers.

Planting table in the greenhouse with flowering creeping zinnias in black pots
A flowering plant being lifted off the table, on the right its values with quality and growth stage
Fully grown and ready to sell. On the right the values of the plant in hand.

What's next

After the verbena, the creeping zinnia was the second plant that didn't have any old model at all. Since then I build almost all new plants this way, from photos and sometimes from videos of real plants. Next time I'll tell you about the plumbago. When it comes to blue, it's my all-time favorite, I don't know a more beautiful blue. It's the first plant in the game with blue flowers and one of the first you can also get on a trellis.

Planting table with young plumbago plants, in front a larger plumbago with pale blue flowers held in hand, its values on the right
A little preview of the next post: the plumbago.

Questions or comments? Feel free to write to me at info@gaertnerei-simulator.de.

Weitere BeiträgeMore posts